🐸My Etsy Sh🌎p🐸

Showing posts with label sewing. Show all posts

Saturday, March 16, 2013

Quotes Quilt

 My daughter is graduating high school in May and I am so happy and so sad at the same time.  She is going away to college and she is the Rory to my Lorelai - we are the Gilmore Girls.  We laugh, we eat, we watch movies, we talk, we snuggle up and watch Chicago Fire.  :)

She is a wonderful person - yes, I am a little bias - but people tell me that all the time.  She is smart and beautiful and hard-working and so-not-an-athlete, but I couldn't be prouder.  When I was trying to come up with a graduation gift, I was just at a loss.  Then...the idea of a Quotes Quilt grew in my head.
 She loves quotes.  She has them on her wall.  She has the on her Pinterest boards and Instragram and in her art journals.  It is a mix of favorite quotes, movie lines, song lyrics.
 I was off this week, so...made it this week and hope to keep it a surprise for graduation, but if she sees it, it's okay, too.  (Trust me, she doesn't visit here)
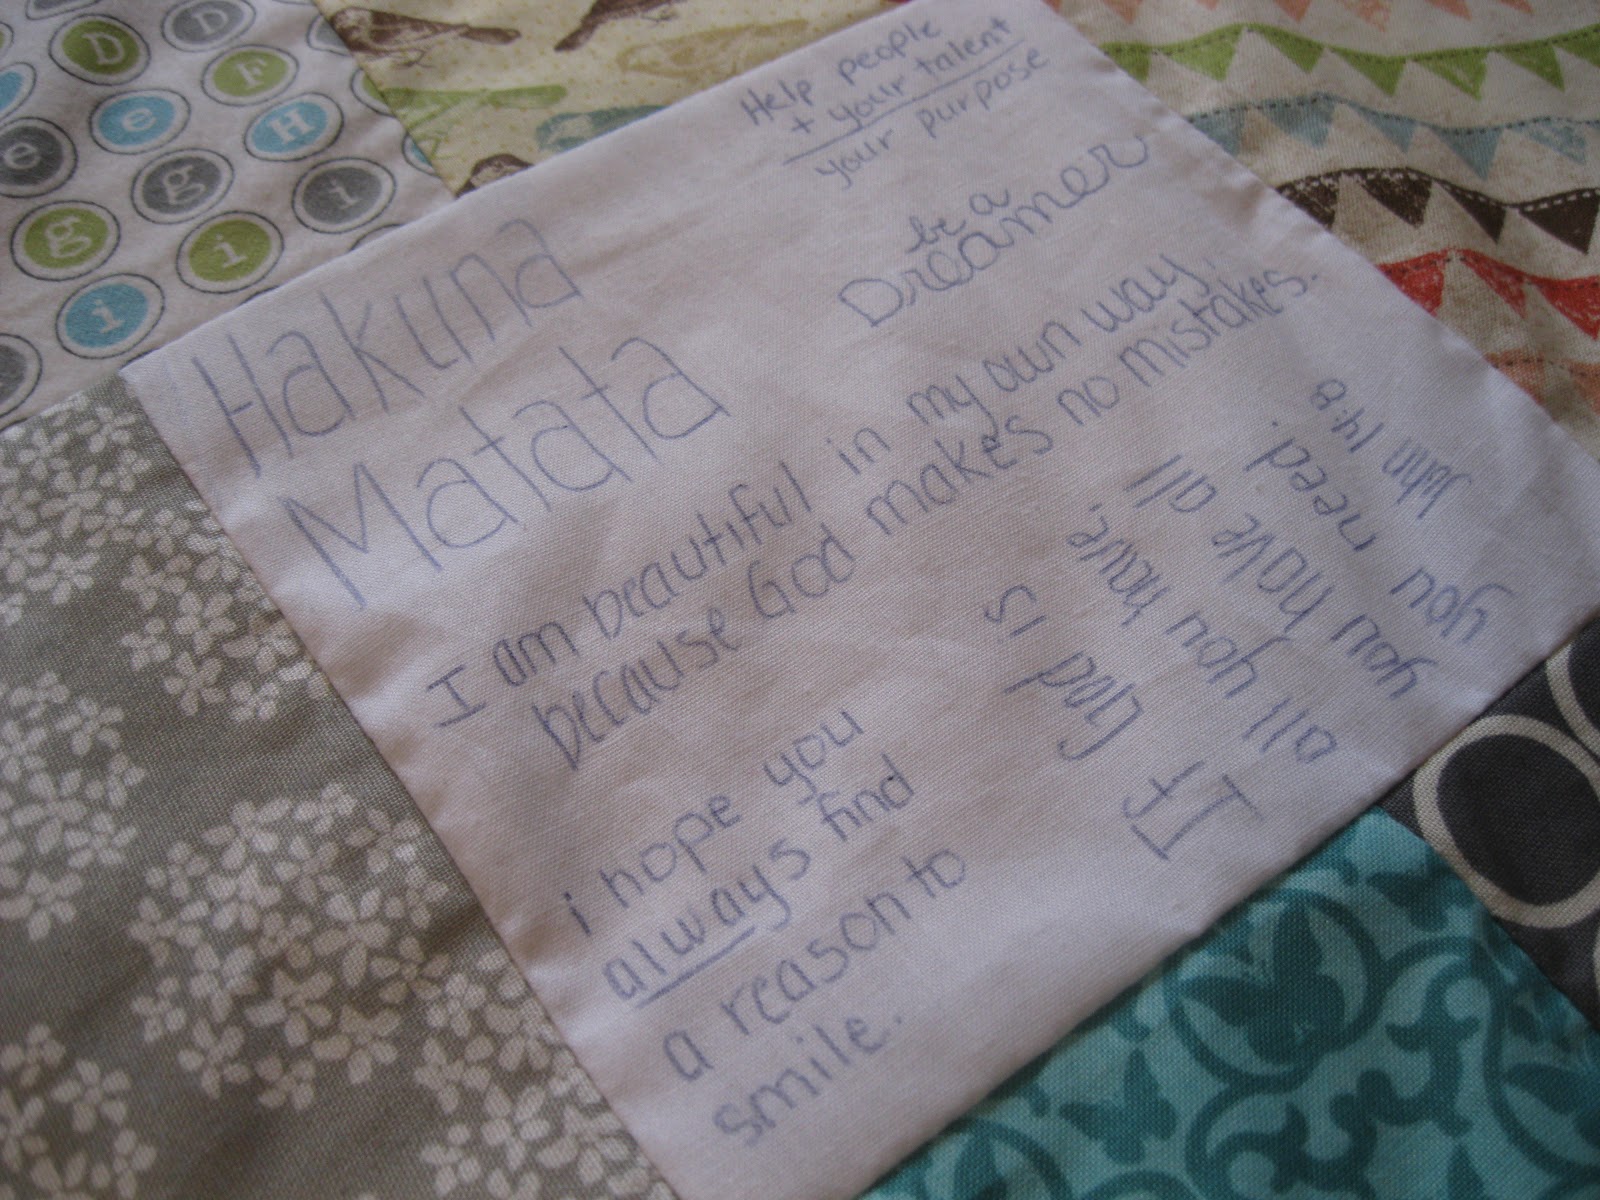
 "I am beautiful in my own way, because God makes no mistakes."
 Yes, there are quotes from Harry Potter and Pitch Perfect and Winnie the Pooh and Maya Angelou and Bible scripture.
 So I bought the different fabrics on Monday and Tuesday, layed it out on Wedneday and sewed together.  On Thursday, I wrote all the quotes on - which took longer than it did to sew it.  Mainly because I was a sobbing idiot.  Some of the quotes are so touching, so "us".
 I want her to take this quilt to college and if she is feeling sad or discouraged or is missing home, then she can read it and find warmth and comfort and a part of home.
 "You were given this Life because you are strong enough to live it" - I think this quote is so true with some of the things she has gone through in the past year.
 Above are lyrics to a Jason Aldean song...don't back up, don't back down...dig a little deeper when you thing you can't dig no more...It's the only way I know.  She is a country girl at heart.
 The best part is...she isn't going to have a guest sign in book at her graduation party.  Guests - family and friends - will sign the back of the quote with words of encouragement and hope and fond memories.


 "Clear eyes Full hearts Can't Lose" is from her favorite show Friday Night Lights.
 There are even quotes from Mr. Feeny from Boy Meets World (we love that show in this house!)
 It was a labor of love.  My life, her life, our lives will dramatically change in the fall.  I hope that I have been a good enough mother to her, have given her the tools that she needs, and pray that she is happy and safe and loved and successful.
I will be finding reasons to visit and send care packages frequently :)  But a little bit of me will be with her wherever she goes.  Graduation will be here before we know it.  The gift is done and now I need to focus on party invites, decorations, and flowers.  It's been an amzing journey this thing they call childhood - for me and for her.  I have grown up and learned as much as she has.  I cannot wait to see what she does next.  Whatever it is, it will be amazing.

Wednesday, March 13, 2013

The Bowties are a Hit!

 So the bowties that I Made the team...
 a hit.  Several girls wore them to school today :)


Saturday, March 2, 2013

Steelers T-Shirt Quilt

 So...my brother in-law is a HUGE Steelers fan (that's is an understatement) and his birthday is tomorrow.  A couple weeks ago, my sister in-law asked me to make a t-shirt quilt.  "Sure!" I said.  Ask me today and I will say, "Never again."
 25 t-shirts later.
7 yards of black broadcloth.
2 1/3 yards of wool blanket batting.
14 hours.
2 boobins.
250+ pins.
 My first sign that this was not going to be an easy task was my mother (the woman who has made wedding dresses and prom dresses and princess dresses) said to me, "good luck with that." Ugh
 T-shirt fabric is difficult to work with.  It stretches.  It rolls up.  It does not play well with others. :)  Once we got the layout of the quilt, I began cutting.  I felt a pang of guilt for cutting into these expensive t-shirts.  My guilt turned to frustration because the fabric was not cooperating.  But, in the end, it all came together.
It measures 78 inches wide by 84 inches long.  It weighs about 10 lbs.  I hope he likes it.  Happy Birthday, Keven.
Mel

Saturday, August 28, 2010

Tutus and Butterfly Wings

My dear friend's daughter wants to have a tea party for her birthday. I said, "I will make the tutus and butterfly wings!"
It's really easy (and inexpensive).
You will need:
black felt by the yard for the wings
various colors of felt squares for the wing design
ribbon
3/4" elastic for waist band
sewing machine or hot glue gun
thread
scissors
Measure the waist of your little fairy and cut the elastic to that exact length then sewing to make a circle or band.
Cut the tulle/netting in strips of 2 inches or so. You can vary it.
Simply tie the strands of tulle/netting around the elastic band. I put it over my knee to make it easier to tie. I added a ribbon in every 4 or 5 strands of tulle/netting. Add tulle/netting until you get the fullness that you want.
Here are the wings laid out. I double layered the black felt for sturdiness. I just used simple shapes to make the butterfly wings and stitched them on. You could hot gun them if you are sewing challenged.
Here is the finished project. Isn't she cute. She did not want to take it off! Oh, it's going to be an adorable fairy tea party.

Sunday, June 13, 2010

Nest Corsage

So we are planning a baby shower with a nest/bird/woodsy kind of theme. I wanted to make special corsages for the mommy-to-be and the grandmas. I have been deliberating for weeks. Then POW! it hit me. Nest corsages! Of course.
I used:
*brown felt
*green felt
*plastic eggs
*scissors
*a pen
*a cd for tracing
*glue gun
*pin backs (Package of 10 - $1.29 at JoAnns)
1. I traced the cd onto the brown felt.

2. I roughly cut out the circle to make it look more natural.
3. I cut the circle in a spiral.
4. I used a paper punch and brown cardstock to make the back look more neat.
5. I took the spiral and formed it into a 3d nest-looking shape.
6. I cut out 2 leaves but folding the felt in half and cutting out a leaf shape.
7. I turned the nest upside-down and hot glued the edges.
8. I glued the leaves onto the edges.
9. I glued the cardstock circle onto the back.
10. Next, I glued the pin back on.
TA-DAH!